React is a widely used JavaScript library for developing user interfaces. At the same time, Amazon Web Services (AWS) Simple Storage Service (S3) is a cost-effective, high-performance web-based storage solution. Companies arrange system which provides secure data storage and applications for online backup and archiving.
Amazon S3 provides a service for hosting static websites that eliminates the need for additional resources. Your web content is stored in an S3 bucket and can be served directly to visitors without other components.
Organizations can take the help of React programmers who set up Amazon S3 and CloudFront, it is possible to create a cost-efficient and scalable solution for hosting static websites. This setup is for single-page applications, such as those built with React. This article will demonstrate how to use S3 and CloudFront to host a React app.
Also Read: Use of React Bad Setstate() Call
Overview of Amazon Web Services S3 Bucket
Amazon S3 is a cloud-based storage system designed to provide businesses with a secure, reliable, and scalable way to store and access large amounts of data. It offers protection and availability of data, as well as the ability to quickly scale up or down according to the needs of the business. It helps to store and protect their data for various uses, from websites and mobile applications. In addition, it provides support for backing up and restoring, archiving, enterprise applications, Internet of Things (IoT) devices, and large data analytics.
Amazon S3 offers a comprehensive way to manage data, with features allowing you to configure and tailor access controls to suit your specific business, organizational, and compliance needs. It has an incredibly high-reliability rating of 99.999999999% (11 9’s), making it suitable for the storage needs of businesses worldwide for a vast array of applications.
Also Read: Understanding unique keys for array children in React.js
Method To Host A React App On An Amazon Web Services S3 Bucket
A React app is static, meaning that once built, all files are, and no further instructions need execution. Another benefit is that hosting a React app on Amazon S3 is incredibly affordable. Additionally, Amazon S3 makes updating and deploying applications elementary and straightforward. Here is the technique to host the react in the Amazon Web Services S3 bucket:
Step 1:
Launch Amazon Console
Step 2:
Create Bucket On S3
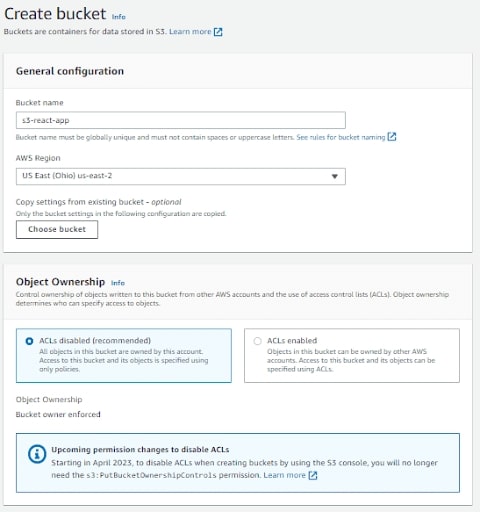
React development experts will go to the AWS console, and select the S3 service from the services tab. You read to a page with a list of existing buckets and a “Create bucket” button. Click this button to create a new bucket and fill in the required information.
Create a new S3 bucket with the name mychoice123 and click next. Create the bucket by setting all the necessary parameters and leaving the rest as default. The newly created bucket will be visible and accessible from the dashboard.
Step 3:
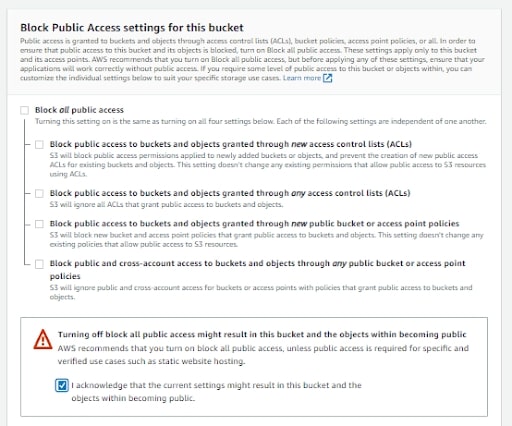
Specify the name of the bucket (for example, deploy-react-app), deselect “Allow Public Access,” tick the acknowledgment box, and click “Create Bucket”
Step 4:
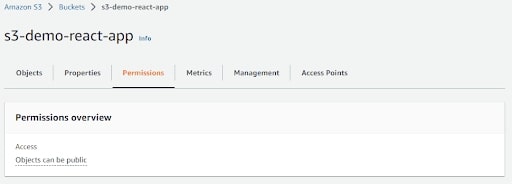
Click the permissions tab after selecting the created bucket
Step 5:
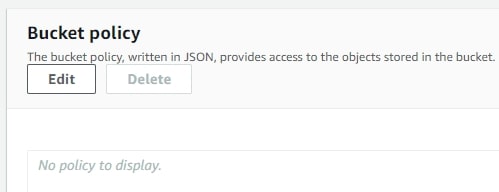
Select Edit Bucket Policy.
Step 6:
Click on Edit Bucket Policy, replace your bucket name with the following policy pasted into the policy editor, and then click Save Changes.
{
    "Version": "2012-10-17",
    "Statement": [
        {
            "Sid": "PublicReadGetObject",
            "Effect": "Allow",
            "Principal": "*",
            "Action": [
                "s3:GetObject"
            ],
            "Resource": [
                "arn:aws:s3:::your-bucket-name/*"
            ]
        }
    ]
}
Step 7:
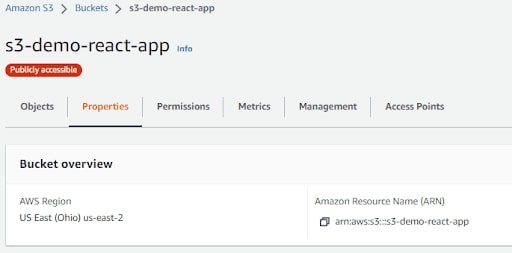
Click the Properties tab.
Step 8:
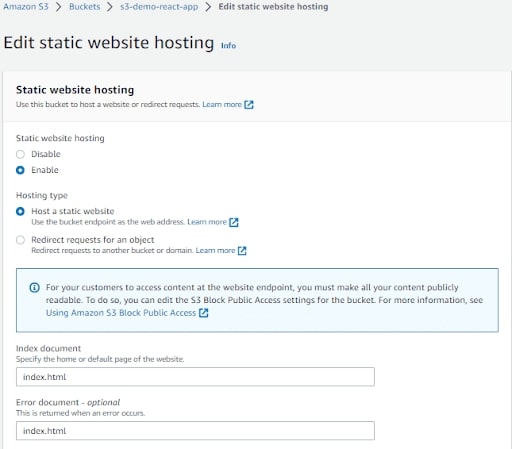
Choose Edit under Hosting for Static Websites.
Step 9:
Allow hosting for Static Websites, type index.html in the Index and Error documents, and then click Save Changes.
Step 10:
The webpage endpoint should be located and copied into Notepad.
Steps on How to Upload Objects on S3
Step 1:
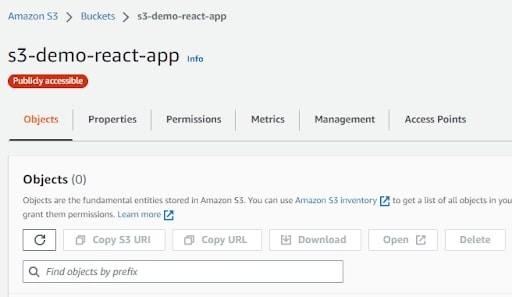
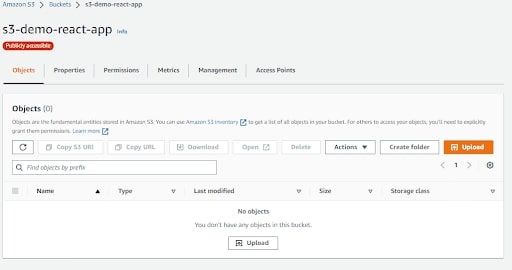
Select the S3 bucket’s Objects tab.
Step2:
Tap on the Upload button
Step3:
Drop all files and folders into the S3 console using the drag-and-drop method.
Step4:
The S3 console’s Upload button should be clicked.
Step5:
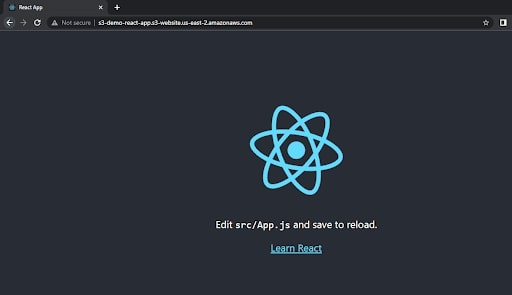
Access the website endpoint in the browser that we saved in Step 10 of the Configure AWS S3 procedure.

Conclusion
The first thing to think about is picking the best web hosting company. It offers the web space needed to store the website files required for the site to be seen online.
Although it is possible to deploy a web application to Amazon S3 through a serverless architecture such as DynamoDB, AWS Lambda, and API Gateway, the primary purpose of Amazon S3 web hosting is to serve Static Websites.
Are you looking to host React app on the Amazon Web Service along with an S3 bucket in your application for your services? Then hire React developers who will help you develop high-ended mobile apps for your enterprises. Feel free to connect with us!
Frequently Asked Questions?
1. How to deploy the application in S3?
Build your React application by running the npm run build command in your project directory. This will generate a build folder in your project directory that contains the optimized and minified version of your React application.
2. How to create an S3 bucket for React app?
On the AWS console, find “S3” and then go to the S3 dashboard. Tap on “Create bucket” and give the bucket name. Remember that the name of the bucket name must be unique, which does not exist; otherwise, it will generate an error while deploying the app.
3. What to use S3 for your web application?
Use Amazon S3 is the object storage created to store and retrieve data from anywhere. S3 is the easy storage service that gives the industry the leading availability, durability, and security, have unlimited scalability at very low costs.
Book your appointment now

