
One of the integral parts of many applications is form validation. Mobile application developers always deal with the forms because it is essential to show relevant warnings to the users whenever they do not fill up the form correctly.
Developers need to do this task appropriately, and for that, they need to write specific validation logic. Here, you will learn how to perform form validation with flutter Bloc. Are you facing any trouble while implementing this step and looking for an expert developer to perform the form validation process correctly in your business application? Then hire a Flutter developer from bosctechlabs.com today..
What does Flutter Bloc mean?
Flutter Bloc is the state management in Flutter. You can access it to handle all the states you wish to perform in the flutter applications. It also acts as the best and simplest way to do state management. It allows you to effortlessly add any type of change to the flutter application.
Regardless of your level, you can learn the concept quickly and add this dependency to your project. Google has created Bloc, which is nothing but the design pattern assisting to separate business logic from the aware layer. Additionally, it authorizes the developer to use the code efficiently.
Flutter Bloc has several widgets such as Bloc Builder, Bloc Selector, Bloc provider, MultiBlocprovider, Bloc Listener, and Multi Bloc Listener. Every widget performs a specific action, and thus you have to use the right one suitable for your Flutter project.
How to do form validation in Flutter
The Flutter SDK renders the out-of-the-box widget and functionalities to make the user’s lives easier while accessing form validation. Two different approaches exist for form validation: the form widget and the provider package. Here are the steps to follow to start form validation in Flutter. Make sure you follow every step properly to get the desired output.
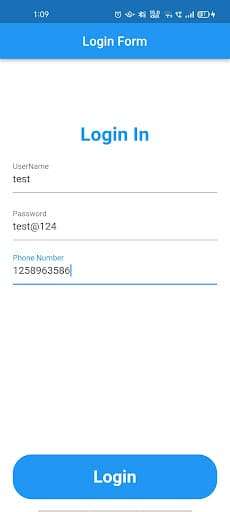
- Create a form in Flutter; for instance, create a simple login page using the fields such as email, password, phone number, and name.
- Set up the form to validate
- Input validation and input formatters
- Access Regex methods and Dart extension methods in the flutter project
- You need to create the input fields required for the form.
- Make the custom form field.
- Perform form validation using provider, Bloc, or other techniques
Here, you will know in-depth about the Bloc because it is the best way to validate the form. The bloc library renders the Flutter package for validating the fields. It is commonly called form_bloc.
How to perform form validation using flutter Bloc
As soon as you implement form validation using flutter BLoC, you need to add dependency in pubspec.ymal file to get all the properties of the Bloc. As a result, you can use it for state management efficiently.
dependencies:
flutter:
    sdk: Flutter
cupertino_icons: ^1.0.2
rxdart: ^0.27.3
flutter_bloc: ^8.0.1
Here, two dependencies rxdart and flutter_bloc are used. RxDart extends the capabilities of the Stream controllers and Dart Streams. Flutter_bloc is the use of Bloc Provider to render the Counter-cubit to the Counter-page and then react to the state changes with the BlocBuilder.
Create the cubit class (login_bloc_cubit.dart) for the app that is an abstract class Cubit extends Bloc-base. Then, create the class by the name LoginScreenCubit(). After that, define the argument constructor and all the controllers you have used. Here is how it looks!
LoginScreenCubit() : super(LoginInitial());
//define controllers
final _userNameController = BehaviorSubject();
final _passwordController = BehaviorSubject();
final _phonenoController = BehaviorSubject();
You can obtain the data with the help of defined and stream controllers like below mentioned.
Stream get userNameStream => _userNameController.stream;
Stream get passwordStream => _passwordController.stream;
Stream get phonenoStream => _phonenoController.stream;
Now, it is time to create the method for clearing the data. For that, you can use the following code.
void dispose() {
updateUserName('');
updatePassword('');
updatePhoneNumber('');
}
Then, add the methods for validation. It is one of the vital steps in the entire project in which you can check the users’ value.
//validation of UserName
voidupdateUserName(String userName) {
  if (userName.length< 3) {
_userNameController.sink.addError("Please enter at least 3 words");
  } else {

_userNameController.sink.add(userName);
  }
}
//validation of Password
void updatePassword(String password) {
  if (password.length< 4) {
_passwordController.sink.addError("Please enter more then 4 words");
  } else {
_passwordController.sink.add(password);
  }
}
//validation of Phone Number
void updatePhoneNumber(String phoneNo) {
  if (phoneNo.length == 10) {
_phonenoController.sink.add(phoneNo);
  }
else {
_phonenoController.sink.addError("Please enter valid Phone Number");
  }
}
Then, create the provider class (bloc_provider.dart) that passes all the providers used in the Flutter application.
ListblocProviders = [
BlocProvider(create: (context) =>LoginPageCubit()),
];
Next, you need to wrap MaterialApp() with MultiBlocProvider() that you define already in the bloc_provider.dart in main.
MultiBlocProvider(
providers: blocProviders,
  child: constMaterialApp(
debugShowCheckedModeBanner: false,
home: LoginScreen(),
  ),
);
Then, create the class with the name “login_bloc_state.dart in which you need to define LoginBloc{} and then LoginInitial that extends to LoginBloc{}.
abstract class LoginBloc {}
classLoginInitial extends LoginBloc {}
Finally, in the LoginScreen(login_screen.dart), you must define LoginScreenCubit and add initiState(){}. In that, you can add WidgetsBinding.instance and access the dispose method properly.
LoginScreenCubit? _loginScreenCubit;
@override
void initState() {
WidgetsBinding.instance?.addPostFrameCallback((_) {
_loginScreenCubit?.dispose();
  });
super.initState();
}
Finally, you need to add BlocProvider in _loginScreenCubit. It helps you to get the right output of the login form with the values such as user name, password, and phone number.
_loginScreenCubit = BlocProvider.of(
context,
listen: false,
);
Create UI and access StreamBuilder for the text field to update the data in the UI part properly. Here is the code to use.
StreamBuilder(
stream: _loginScreenCubit?.passwordStream,
builder: (context, snapshot) {
returnTextField(
onChanged: (text) {
_loginScreenCubit?.updatePassword(text);
},
decoration: constInputDecoration(
labelText: 'Password',
),
          keyboardType: TextInputType.text);
    }),
When we run the application, we get the screen’s output like below.
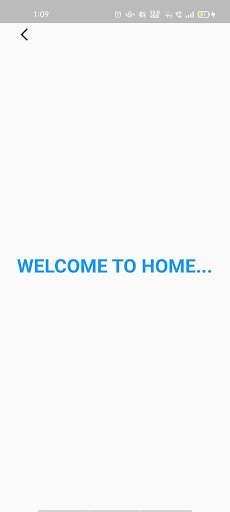
For Bottom Button we also use StreamBuilder. In this we pass _loginScreenCubit in the stream and cheBloc Widgetsck, whether the data is validated or not? after this we return GestureDetector() and apply a condition that if the data is updated then this screen goes to the next screen otherwise the login button is disable. When the snapshot. data is true then the color of the button will be teal otherwise it’s grey. Check out our guide to make floating action button in FLutter.
_bottomButton() {
 return StreamBuilder(
   stream: _loginScreenCubit?.validateForm,
   builder: (context, snapshot) {
     return GestureDetector(
       onTap: () {
         if (snapshot.hasData) {
           Navigator.push(
               context, MaterialPageRoute(builder: (context) => Home1()));
         }
       },
       child: Container(
         decoration: BoxDecoration(
             color: snapshot.hasData ? Colors.teal : Colors.grey,
             borderRadius: BorderRadius.circular(30)),
         height: 70,
         width: MediaQuery.of(context).size.width,
         child: const Center(
           child: Text(
             'Login',
             style: TextStyle(
                 color: Colors.white,
                 fontWeight: FontWeight.bold,
                 fontSize: 27),
           ),
         ),
       ),
     );
   },
 );
}

Conclusion
This blog demonstrated how to perform form validation in Flutter with the help of Bloc. Besides, plenty of methods are there to do the same things. It would help if you used the right technique suitable for your Flutter project.
Book your appointment now