Creating an Animated Progress Meter in React Native: A Step-by-Step Guide
A popular way to display the status of a job or procedure on a user interface is via progress meters. There are several approaches to building progress meters in React Native. This article will demonstrate how to use the Animated API to make an animated progress meter. We can design a visually beautiful and entertaining lively progress meter by utilizing the Animated API in React Native.
From creating the project to including the animation, the tutorial will guide you through making an animated progress meter. After the instruction, you will have a basic understanding of how to make lively progress meters in React Native.
Why Use an Animated Progress Meter?
You may wish to implement an animated progress meter in your React Native app for several reasons:
- Your app’s animations may give it more life and engagement. They can enhance the interactive and engaging experience of your app, which can assist in maintaining users’ attention. Users may see how far along they are in a task or how much time they have left to finish it with the help of an animated progress meter, for instance. Users may remain motivated and interested in the current work due to this.
- Animations can help people to understand information more quickly. Users may see how far along they are in a task or how much time they have left to finish it with the help of an animated progress meter, for instance. This is more user-friendly than merely showing a number figure since it lets consumers see how the task progresses.
- Using animations can enhance the visual appeal of a user interface. Adding a well-animated progress meter can make your software more polished and professional. This may contribute to improving your app’s overall user experience.
- Animated progress meters can serve as a valuable tool for enhancing the user experience of your React Native project. They may make an interface more aesthetically attractive, present information more naturally, and offer a sense of vitality and engagement.
How to Create an Animated Progress Meter in React Native?
A speedometer is a visual depiction of a value between a specific range and, often referred to as a gauge or performance meter, is frequently used to show the status or progress of an activity or process. Using the Animated API and some fundamental geometry, you can add a speedometer animation to a React Native project.
Here is an instance of using React Native to make an easy-to-use speedometer animation or animated progress meter.
To create the animated progress bar in React Native, refer to the instructions below:
Step 1: Change the speedometer’s SVG component to a React NativeComponent
We will first translate the progress meter’s SVG component into an RN component. We must separate the pointer and meter components, which can be displayed using react-native-svg before the same output can be seen in the JSX in React component library.
Step 2: Define the Method Of Interpolation
Following that, we shall specify the interpolation following the progress meter’s component design. Please modify the below function’s input and output ranges in light of the arrangement of your SVG component.
const animInterpolation = progressValue.interpolate({
inputRange: [0, 1, 2, 3, 4, 5, 6, 7, 8, 9, 10],
outputRange: [
   '-90deg',
   '-90deg',
   '-90deg',
   '-45deg',
   '-45deg',
   '0deg',
   '0deg',
   '45deg',
   '45deg',
   '90deg',
   '90deg',
],
  });
Step 3: Making the Needle Part of the SVG Image
Next, using react-native-svg and code from GitHub repository, we integrate the anchoring point helper element for the needle. We need to enter the start point for the turn in the getTransform() method.
const getTransform = () => {
let transform = {
   transform: [{perspective: 1}, {rotate: animInterpolation}],
};
return withAnchorPoint(
   transform,
   {x: 0.5, y: 1},
   {width: 125, height: 150},
);
  };

{x: 0.5, y: 1} states that the rotation should occur on the mid-bottom point.
Step 4: Add SVG Components to The Animated View
The animation is provided through the React-Native Animated API. The needle may animate by specifying a use effect for auto-animation or using the click handler code, as seen below.
function onButtonClick() {
if (progressValue !== score) {
   setScore(Math.floor(Math.random() * (10 - 1 + 1) + 1));
}
  }

  useEffect(() => {
if (score > 0) {
   Animated.timing(progressValue, {
     duration: 2000,
     toValue: new Animated.Value(score),
     useNativeDriver: true,
   }).start(finished => {
     console.log('finished====', finished);
     if (finished) {
       setFillColor('#91d9ae');
     }
   });
}
  }, [progressValue, score]);
Step 5: Ultimate Design
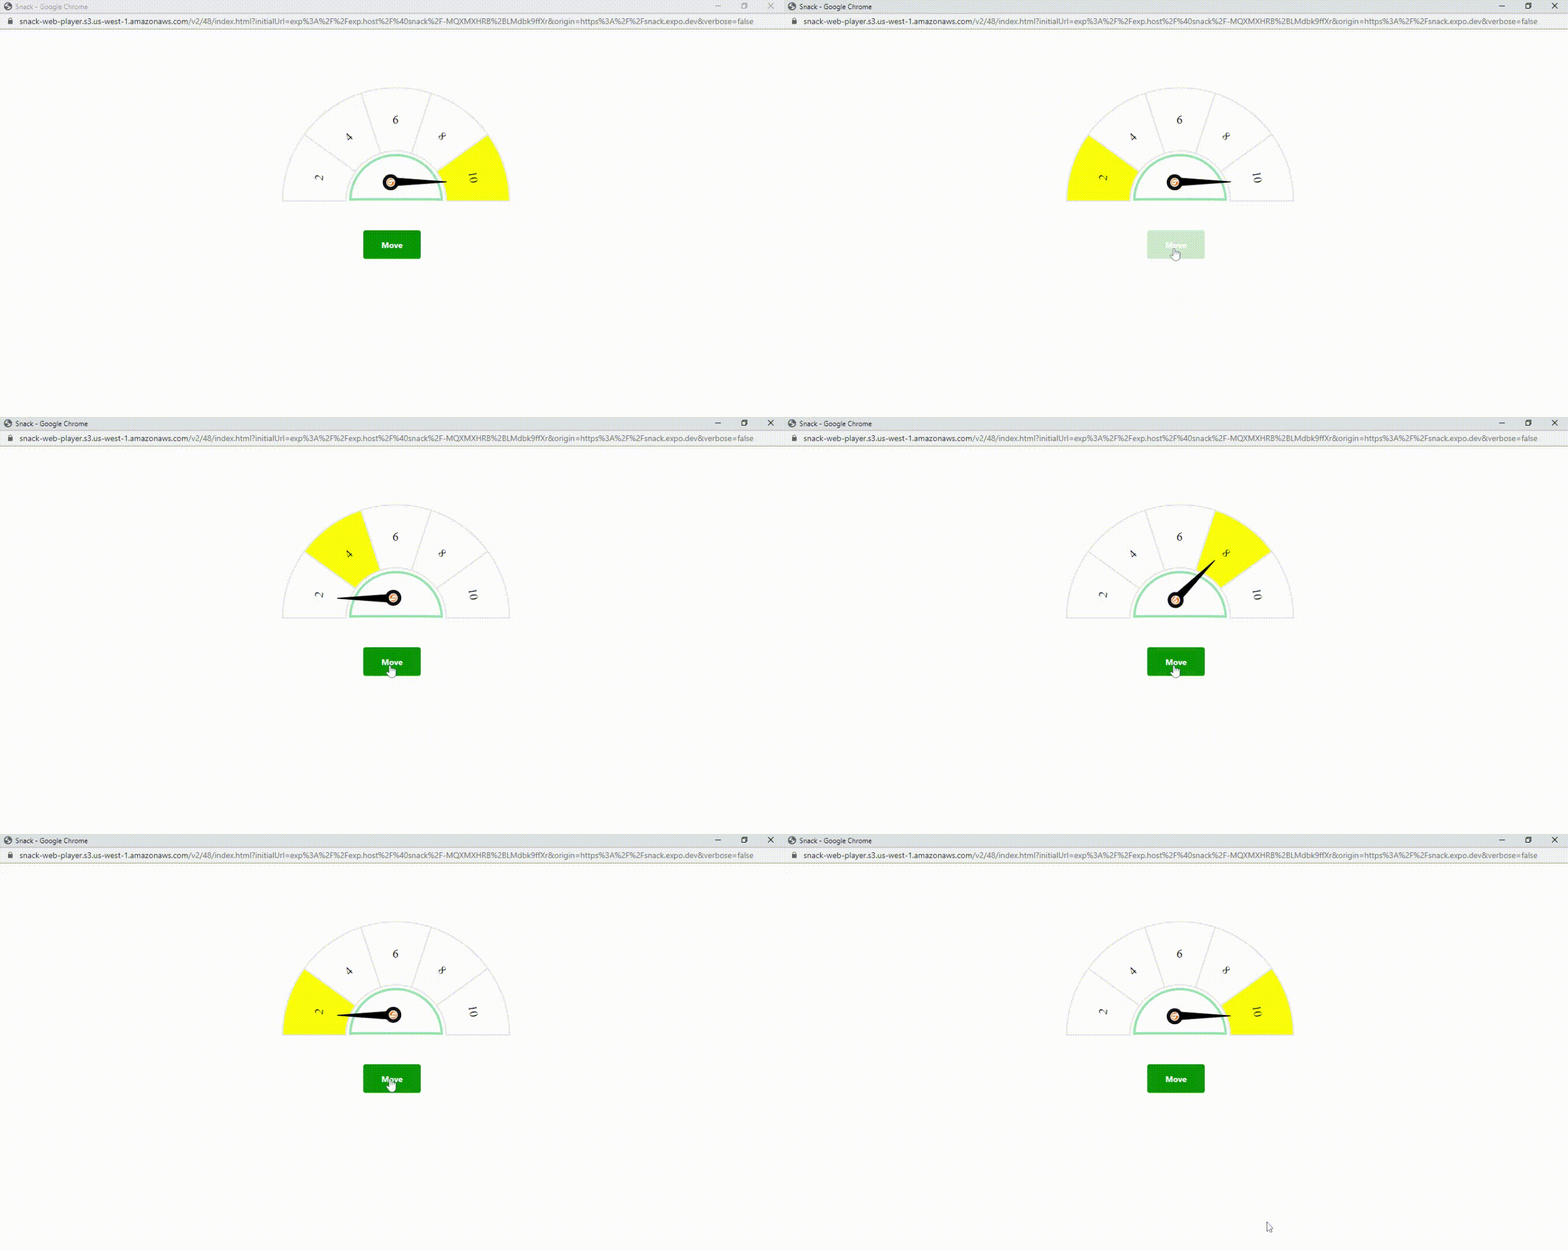
You can now access the GitHub repository developed, from which you may utilize the code to construct a React Native animated progress meter.
Output

Conclusion
In this article, you learned how to utilize the Animated API for constructing an animated progress meter. You can make your lively progress meters by following the instructions and you can use them to give your React Native apps a sense of life and engagement.
Hire React developers from Bosc Tech Labs who is ready to assist you with your development requirements. Although React Native is our area of expertise, we have also worked with various platforms and technologies. If you need assistance with React Native, we will be happy to discuss your project with you and assist you.
Frequently Asked Questions (FAQs)
1. How does React Native use animation?
Making an Animated.value is fundamental to the animation creation process. The value must be connected to one or more styles of certain aspects of an animated component before being used to drive updates during animations with Animated. timing(). Avoid making direct changes to the animated value. To return a mutable ref object, use the useRef Hook.
2. What does a React Native animated event mean?
A valuable technique for automatically setting a value on an animated is the Animated. event. An array of keys and a value are provided. This is usually used in conjunction with the onScroll or onPanResponderMove events.
3. How do you demonstrate progress in React?
We may include a progress bar in the React application by using the react-progress-bar component of the ranmonak NPM package. Users must enter the following command into the console for the current React application to include the Ranmonak library.
Book your appointment now
